- Key takeaways
- Beekeeping in 2021: key statistics
- The history of beekeeping: how modern beekeeping came to be
- An introduction to beekeeping
- Choosing and setting up a beehive
- How to start beekeeping
- Collecting honey from your beehive
- Storing and selling honey
- How to protect your beehive from pests and diseases
- Local rules and regulations
- About the author
- Useful links

Beekeeping
The Ultimate Guide To
Contents
1. Key takeaways
- The earliest evidence of collecting honey dates back to 15,000 years ago, whereas efforts to domesticate or manage bees only began 4,500 years ago.
- Hives function according to a strict hierarchical structure. A queen bee, drone bees and worker bees all have different roles.
- Queen bees can lay up to half a million eggs in their lifetime, which could be as long as three to five years.
- Drone bees do not work, do not forage for pollen and cannot collect nectar. They have no other known function than to mate with and fertilise new queens.
- Worker bees may only live for about six weeks.
- The British Beekeepers Association represents the interests of over 25,000 hobbyist beekeepers and the three billion plus honey bees for which they care.
- If bees don’t have sufficient food supplies, you can make food for your colony.
- Bee colonies can be vulnerable to pests and diseases including Varroa mites, small Hive Beetles, European Foulbrood and Colony Collapse Disorder – a relatively under-researched phenomenon when worker bees from a honey bee colony disappear for no apparent reason.
- The average hive produces 25lbs of honey, which in a good season can increase up to 60lbs of honey.

2. .Beekeeping in 2021: key statistics
According to WWF, bees are essential to our food supply:
- Almost 90% of wild plants and 75% of leading global crops depend on animal pollination.
- One out of every three mouthfuls of our food depends on pollinators.
- Crops that depend on pollination are five times more valuable than those that do not.
The economic benefit of this pollination to crop production is estimated to be approximately £600m each year in the UKz
Are bees in danger?
Friends of the Earth confirm that:
- Since 1900, the UK has lost 13 species of bee.
- A further 35 are considered under threat of extinction. None are protected by law.
- Across Europe nearly 1 in 10 wild bee species face extinction.
Known causes of bee decline include:
- Changes in land use
- Habitat loss
- Disease
- Pesticides
- Farming practices
- Pollution
- Invasive non-native plant and animal species
- Climate change
How can honey bees be protected?
Introduced in November 2020 by the UK Government, The Healthy Bees Plan 2030 outlines plans to protect and improve the health of honey bees in England and Wales.
It outlines outcomes for beekeepers, bee farmers, associations and government to work towards. These are:
- Effective biosecurity and good standards of husbandry to minimise pest and disease risks and so improve the sustainability of honey bee populations.
- Enhanced skills and production capability/capacity of beekeepers and bee farmers.
- Sound science and evidence underpinning the actions taken to support bee health.
- Increased opportunities for knowledge exchange and partnership working on honey bee health and wider pollinator needs.
How can beekeepers help?
Launching the Healthy Bees Plan 2030, Pollinators Minister Rebecca Pow, said: “During the coronavirus pandemic we have seen an increased connection with the natural world, and the new Healthy Bees Plan provides a blueprint to look after the health of some of our most important insects – the bees – our unsung heroes. Bee health stakeholders have had a key role in developing our plan, and we look forward to working together to help ensure our bees can survive and thrive for future generations.”
Beekeepers are considered key stakeholders in the overall health of the bee population. But there are concerns over the number of beekeepers, especially in UK cities, because they focus on looking after honey bees when there are actually 270 species of solitary bee and 25 species of bumblebee. We need to protect a diversity of pollinating insects, as focusing just on honey bees can create resource shortages. According to The Guardian, just to stay alive each beehive will consume 250 kilos of nectar and 50 kilos of pollen.
That doesn’t mean all beekeeping is bad for wild bees, though. As The Bumblebee Conservation Trust say, it is about informing people of best practice and encouraging responsible beekeeping and well-thought-out hive placement. Looking after your own hive is a considerable responsibility, as we’ll outline in this guide. It is something which takes a lot of time and effort. It’s worth noting that you also don’t have to be a beekeeper to support bee-friendly communities. You can:
- Plant flowers rich in nectar.
- Choose local, British honey.
- Create a bee hotel for wild bees.
- Choose organic fruit and vegetables.
- Encourage your friends and neighbours to do the same.
3. The history of beekeeping how modern beekeeping came to be
Historically, before the advent of commercially produced sugars made from cane and beet, honey was the only natural sugar available and mankind has always loved and craved the sweet taste of golden honey. Collecting honey from wild bee colonies is one of the most ancient of human activities and many indigenous societies in parts of Africa, Asia, Australia, and South America continue this method of harvesting honey to this day.
Some of the earliest evidence depicting humans gathering honey is from rock paintings dating from about 15,000 years ago. However, when honey was gathered from wild bee colonies it usually entailed the destruction of the entire colony. Smoke was used to subdue the bees and the wild hive was broken into and the honeycombs torn out and destroyed. This also resulted in the destruction of the eggs and larvae in the honeycomb. The liquid honey from the destroyed brood nest was saved but the rest of the nest was usually discarded although sometimes the bee larvae were eaten as a source of protein.
In settled societies, the destruction of a bee colony meant the loss of a valuable resource. There was no continuity of production and no possibility of selective breeding, since each bee colony was destroyed at harvest time, along with its precious all-important queen.
Egyptian art from around 4,500 years ago shows early efforts to domesticate bees – although, as all bees are free to come and go as they please and man merely removes honey and other items of interest to him from their colonies, all bees are wild but they are a managed wild creature.
In Egypt, simple hives were used and workers used smoke to help remove the honeycombs from the hives. The honey was stored in sealed jars, some of which were found in the tombs of pharaohs such as Tutankhamun. It is said that honey that had been sealed in the jars and then left undisturbed in the tombs was still edible 4,000 years later.
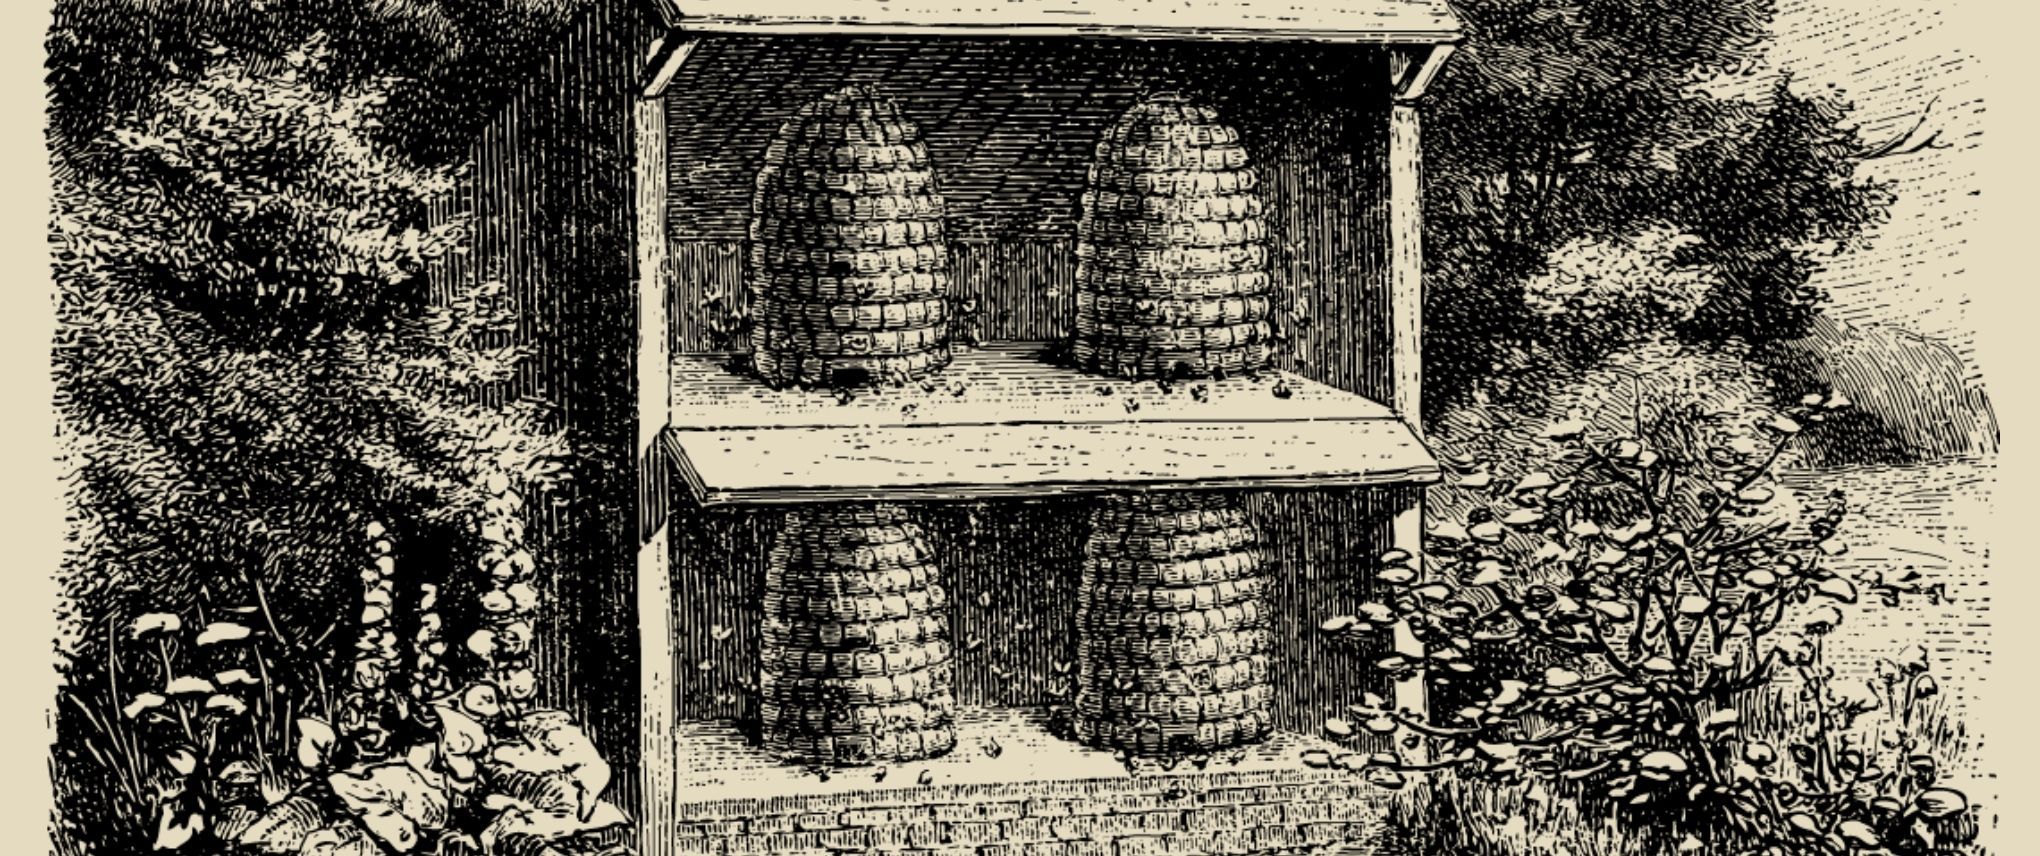
In Europe, before the advent of the modern movable-frame hives, bees were often kept in straw skeps. Because the space available to the bees in these skeps was so limited, they regularly swarmed (which is a natural method of colony reproduction) and this served to replace the colonies which had been killed to obtain the honey. The space for the bees could be enlarged by adding an extra chamber – called an eke (hence the term ‘to eke something out’ which is still used today). Many colonies of honey bees were maintained by religious communities, principally for the wax they yielded. Beautiful cream beeswax candles were produced which burnt without smoke and these were of infinitely superior quality to the candles made from tallow used by the general population.
The honey was welcome as a sweetener and, in areas where vines would not grow, fermented honey was used to make the alcoholic drink mead. As a result, in the monasteries, the beekeeper was a person of considerable importance to the monastic community.
During the Middle Ages people were aware that there was a single large bee that was different to all the other bees in the colony. Traditionally, the hierarchy of a bee hive was thought to reflect the structure of Church and State and thus the bee that clearly ruled the colony was believed to be a king bee. It was not until 1586 that it was discovered that the king bee was actually a queen.
In the 18th century European biologists, or natural philosophers, started the scientific study of bee colonies and began to understand the complex social world of a bee colony. Although scientists were aware that queens laid eggs in empty cells, they did not know how a queen was fertilised and it was a Swiss scientist, François Huber (1750 – 1831) who was the first to discover that queens are inseminated by a number of matings with different drones, high in the air at a distance from their hive, during a ‘mating flight’.
Huber is universally regarded as "the father of modern bee-science" and in Nouvelles Observations sur Les Abeilles disclosed most of the basic scientific facts on the biology and ecology of honey bees. It was this greater understanding of the colonies and the biology of bees that allowed the construction of the movable-comb hive so that honey could be harvested without destroying the entire colony and the breeding of the bees could be controlled – modern bee-keeping was born.
4. An introduction to beekeeping
In order to commence beekeeping and be able to sustain a healthy and productive colony of bees, it is important to be aware of the fundamental characteristics and properties of bees. This section of the guide will introduce you to the properties of the honey bees which you will keep, the hierarchical structure within a beehive and how these bees function as a colony.
Honey bees
Apis mellifera is the most widespread species of honey bee in the world. There are many different strains of this honey bee and Apis mellifera mellifera, the European dark bee, was domesticated and bred in modern times. They are predominantly dark brown and black in colour; these bees are docile and can survive throughout the winter in cool temperate zones by storing large amounts of honey, gathered during the summer months. However, much hybridisation has occurred with Italian and other bees making pure bred Apis mellifera mellifera largely a thing of the past and it is no longer the only significant commercial subspecies of the Western honey bee.
Beehives
The term 'beehive' loosely refers to a structure in which honey bees live and rear their young. Examples of natural beehives include tree hollows and rock structures.
However, the term 'beehive' in modern parlance usually refers to a man-made structure within which bees are kept with either fixed or movable frames. The bees in these man-made beehives are used to produce honey for food or medical use, to pollinate nearby crops and to preserve the local honey bee population.
Within a beehive there exists a complex series of hexagonal cells. These 'honeycombs' are made of beeswax and are used by bees to store not only food, such as honey and pollen, but also to house the brood of eggs, larvae and pupae. In any common honey bee hive there are:
- Approximately 5,000 bees during the winter months – the queen bee and worker bees –
- A large hive in the summer months can house 50,000 bees – the queen bee, worker bees and drone bees.
The hierarchical structure of bees
A bee hive colony functions according to a strict hierarchical structure. Within this hierarchy there are three types of honey bee:
- A queen bee
- Drone bees
- Worker bees
Each of these types of bees has different tasks to carry out within the hive.
The queen bee
The queen bee lays all of the eggs which populate the colony and is normally the only sexually mature female in the hive; all of the female worker bees and male drones in the hive are her offspring. Royal jelly, a creamy white secretion, produced in glands in the heads of worker bees is responsible for turning an egg into a queen bee rather than a worker bee or drone bee. Royal jelly typically contains about 60% - 70% water, 12% - 15% proteins, 10% - 16% sugars, 3% - 6% fats, and 2% - 3% various vitamins, salts, and amino acids.
The queen bee is raised from a normal worker egg, laid in a special elongated ‘queen cell’, but is fed a large amount of royal jelly throughout her development and this results in a radically different growth rate and metamorphosis. All bee larvae are fed royal jelly but after three days the drone and worker larvae are no longer fed in this way and do not experience the rapid growth of the queen.
A queen bee is really just an egg-laying machine. She has a smaller brain than a worker bee and is incapable of even feeding herself. When one buys a new queen bee by post, she arrives in a small box accompanied by her retinue of worker bees without whom she would starve.
A virgin queen, a newly hatched queen, will remain in the hive for 3-7 days until making her first orientation flight to mark the position of the hive. During subsequent flights she may mate with a number of male drones on each flight and, during these mating flights, the queen receives and stores sufficient sperm to fertilise hundreds of thousands of eggs. If she does not manage to leave the hive to mate, possibly due to bad weather, she remains infertile and becomes a drone layer, incapable of producing female worker bees. Worker bees sometimes kill a non-performing queen and produce another as, without a properly performing queen, the colony is doomed. After her mating flights the queen will not leave her hive again unless she swarms with her worker bees.
The queen bee is the largest of the bees in a honey bee colony, measuring around 2 cm – which is about twice the length of a worker bee. She walks with a distinctive gait as she proceeds from cell to cell to lay her eggs which can aid in her identification. A queen bee can live for three to five years, during which time she continues to lay eggs, and can lay up to half a million eggs in her lifetime although she will normally lay most eggs in the first season and her laying rate will decrease throughout her life.
In April and May a queen bee will lay eggs all day and night, the interior of a hive is dark so day and night do not exist for the queen. This process can result in approximately 2,000 eggs being laid each day during her peak laying period. Fertilised eggs become female worker bees and those which remain unfertilised become male bees – drones.
In the winter the rate of eggs laid by the queen decreases dramatically as food supplies of pollen and nectar reduce and the colony must survive on the food stores which have been collected by the worker bees during the summer. This reduced food supply results in the reduction of the number of bees in the hive. In winter the number of worker bees drops from 50,000 to about 5,000. There are no drone bees in the hive as they have been evicted from the hive by the worker bees at the end of the queen-raising season when their use has passed and they are a drain on the colony’s resources.
A healthy queen bee will emit pheromones which inform all other bees in the colony that she is present and in good health. As a result of these pheromones, the bees in the colony are aware if an old queen is removed and a new queen introduced by a beekeeper. New queens must be introduced with great care, after the removal of the old queen, particularly if it is a difficult colony who might attempt to kill the interloper. It is the temperament of the queen that dictates the temperament of the whole colony so beekeepers always aim to have a placid, non-swarming strain of queen.
Drone bees
Drone bees are raised in wax cells which are bigger than those constructed by the worker bees for the worker eggs. When the queen lays an egg, she measures the cell and realises that is it larger than a worker cell and lays an unfertilised egg – amazingly, she can actually control whether she lays a fertilised egg, which becomes a worker, or an unfertilised egg, which develops into a male bee.
Drones are almost twice the size of worker bees and have no sting; they exist within the hive solely in order to mate with the virgin queen. They do not work, do not forage for pollen and cannot collect nectar as they do not have a long enough proboscis to reach the nectar in a flower. They have no other known function than to mate with and fertilise new queens on their mating flights.
However, once they have mated with the queen, they will die as a result of this mating. At the end of the summer any remaining drones are evicted from the hive by the worker bees and this eviction is often quite brutal. All through the summer the worker bees have fed and cared for the drones who play no part in the maintenance of the hive; however, in winter they would be too much of a liability on the colony and they will be replaced the following spring. The worker bees stop feeding the drones and the weakened drones are forced from the hive, often having their wings chewed off by the aggressive workers. They are left to die outside the hive while the worker bees continue to prepare the hive for winter.
Worker bees
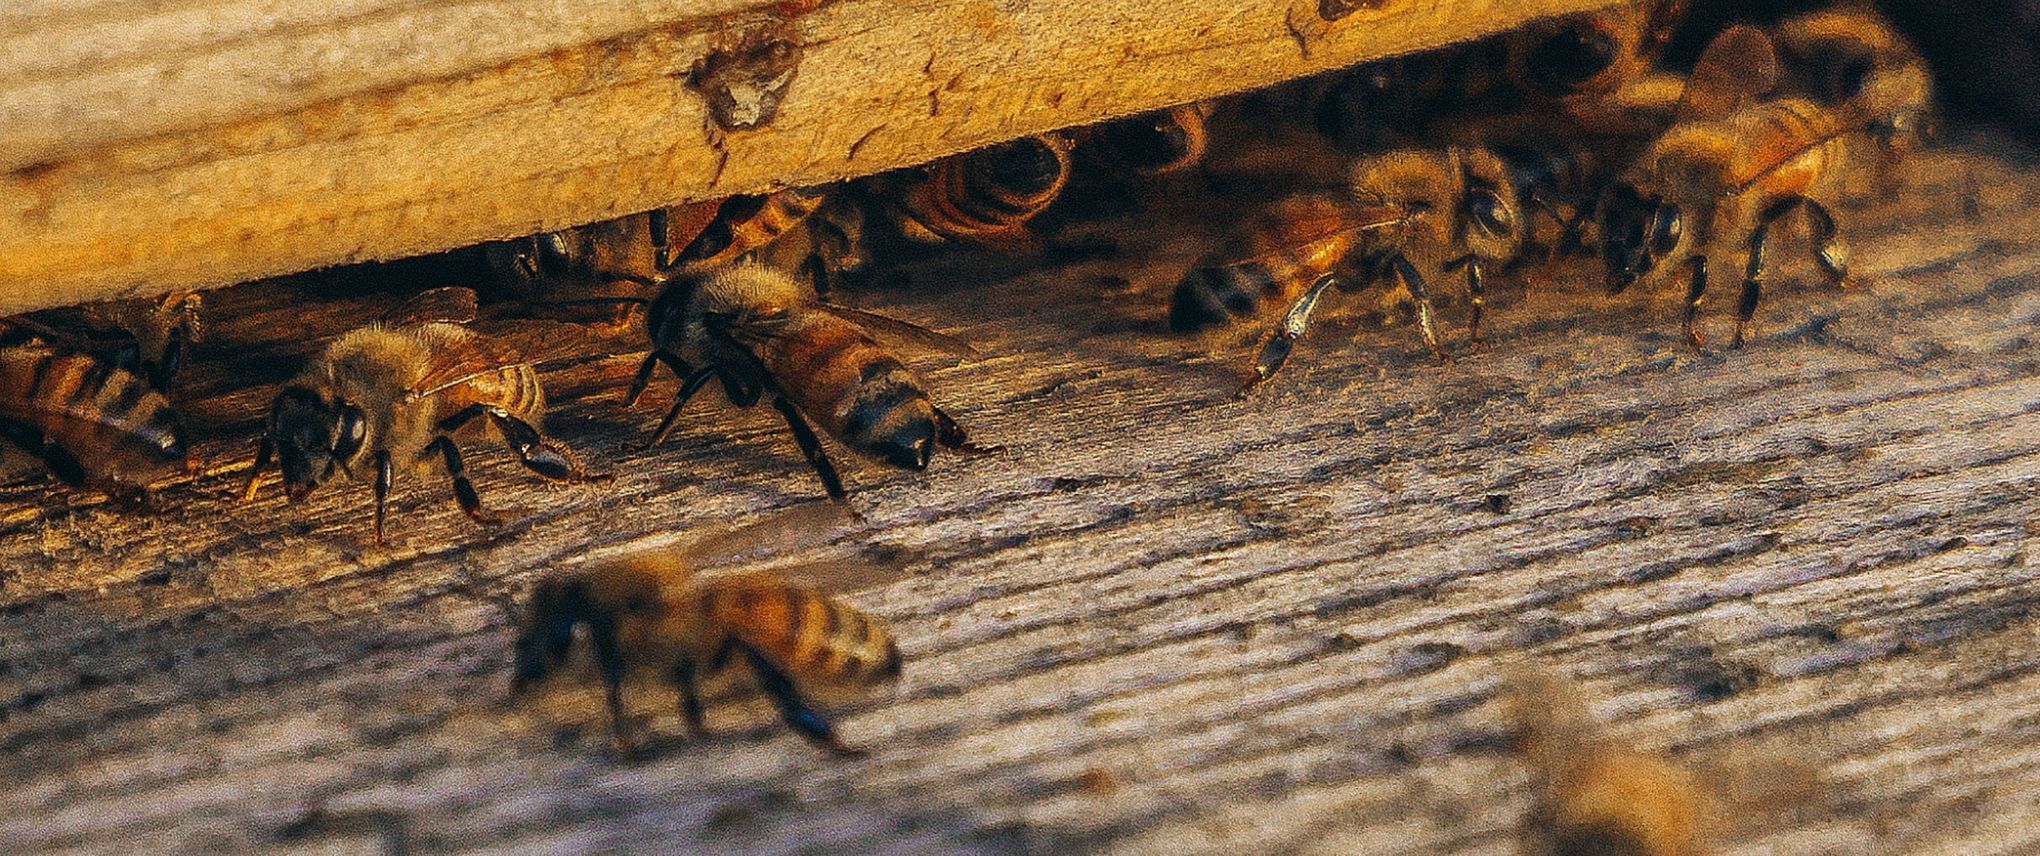
Worker bees represent nearly all the bees in a hive. They are all female but are not able to reproduce and are all daughters of the single queen bee who rules the colony. Worker bees are smaller than drones but do have a sting. However, having stung once they will die which means that, after defending their hive against intruders, you will often see their bodies lying just outside the hive.
They are the general workforce of the hive and carry out all the necessary tasks which enable the hive to function efficiently. They perform different tasks throughout their life, largely dictated by their age.
During the summer months, when activity in the hive is at its peak, worker bees may only live for about 6 weeks. Worker bees start their working life cleaning cells in the hive and caring for and feeding the larvae. It is important for the youngest workers to remain in the hive, as they are still soft bodied and their wings are too delicate for them to fly well. They will then progress to receiving nectar and pollen from incoming foraging bees and then, when they are a little older, they make wax cells – this is a task that is undertaken in teams, as the temperature for wax-building needs to be quite high at 33-35°C.
Only when the worker is about three weeks old does she leave the hive to forage for nectar, pollen, propolis and water. The bee colony always has older worker bees, which are designated as dedicated guard bees, on duty. When the hive is under threat, the guard bees release a pheromone scent which alerts the other workers, so that reinforcements can quickly arrive on the scene to protect the hive.
Between winter and early spring worker bees can live for several months as they rarely leave the hive. When external temperatures fall to about 15°C they gather to form a well-defined rugby-ball shaped cluster within the hive; at the heart of the cluster is the queen. The cluster expands and contracts as the weather warms and cools and, as the temperature decreases, the cluster becomes tighter and more compact as the bees cling tightly together on the combs in the hive. The worker bees constantly vibrate their wing muscles in order to generate heat to keep each other and their all-important queen warm and they maintain the temperature at the core of the cluster at about 30°C.
5. Choosing and setting up a beehive
There are several different types of beehive each of which has specific advantages and disadvantages and the choice depends upon your personal beekeeping preferences. Most modern hives are based on a design published by Reverend L. L. Langstroth in America in 1853. The Reverend Langstroth noticed that bees built their wild comb with a specific distance between the combs (the bee space) and he designed a hive with movable frames set apart so that this vital bee space could be maintained. Furthermore, he separated the colony into a brood box, in which the queen laid her eggs, and a honey super in which the colony stored its excess honey. Variants of this design are used to this day by most beekeepers.
To help you choose the beehive which best suits your needs, listed below are the different types of hive which you may come across:
- Ten-frame Langstroth hive: The Langstroth hive is the most common beehive used worldwide and by American non-commercial beekeepers. These hives consist of several boxes which are stacked together to form a hive. Because the Langstroth hive is so widely used, it is easy to find supplies and spare parts but it is a large and heavy hive so it can be hard to manipulate the boxes and move the hives.
- Eight-frame Langstroth hive: This eight frame version of the traditional ten frame Langstroth hive is slightly smaller in its construction. Although this means that you will be able to store a smaller amount of honey and the brood box is also smaller, it is easier to assemble and manoeuvre.
- The WBC hive: If you ask people to draw a beehive it is most likely that they would draw a WBC hive. Named after its creator, William Broughton Carr, it is an attractive design that is popular as a garden ornament as well as being a practical beehive. The double-walled design insulates against extremes of temperature but the brood boxes and super boxes are slightly trickier to manipulate than for other types of hive which is time-consuming for those who have many hives. It is one of the most popular hives.
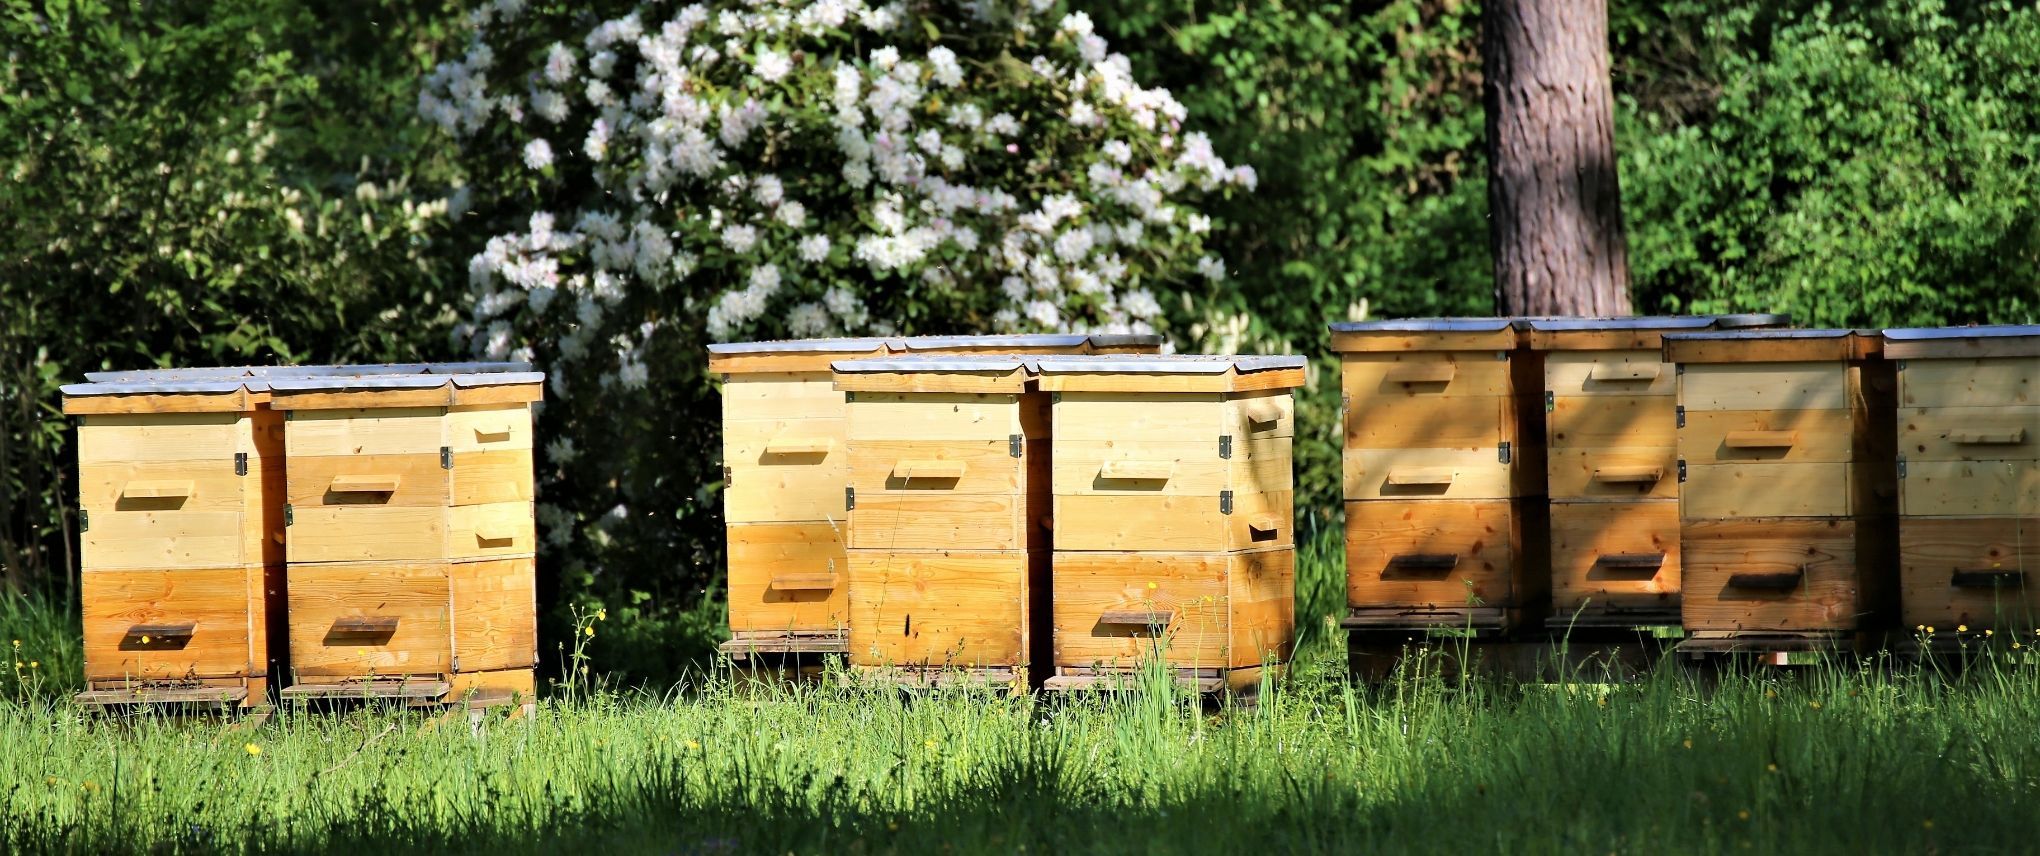
- The National hive: This is the most popular beehive in Britain and these hives are widely used by amateur and commercial beekeepers alike. The National Hive is similar to the Langstroth hive but is smaller and easier to handle. They take 11 British Standard brood frames and measure 18 1/8″ square externally.
- Top-bar hive: Unlike the Langstroth-style hive which functions vertically, a top-bar hive operates horizontally and the comb hangs from removable bars. These hives are considered by their supporters to encourage a more natural form of beekeeping. Top-bar hives are rectangular in shape and are typically more than twice as wide as the multi-storey framed hives commonly found in English-speaking countries. Top-bar hives allow beekeeping methods that interfere very little with the colony but are usually not readily portable. The brood nest is stored at the back of the nest and the honey is produced at the front of the hive. This small, horizontal structure enables one to keep bees in a small garden or another small storage space. The hives are lightweight if they have to be moved, are easy to maintain, and the bees are able to construct natural cell sizes. However, despite these advantages, top-bar hives can result in poor ventilation for the bees if they are not properly constructed and the bees are also more prone to dying in cold winters. Because these hives are less popular than Langstroth-style hives, it is more difficult to find local support and advice.
- Warré hive: A Warré hive consists of several small, square hive bodies and top bars without any frames or foundation. A Warré hive also utilises a quilt and a vented, angled roof. This lack of foundation and the overall size and shape of a Warré hive make it a more natural hive for bees with superior moisture management. However, despite the advantage of minimal inspections by the beekeeper, the frames cannot be moved in a Warré hive as the bees will build and attach comb to the inside of the hive walls. Management of Warré hives calls for the addition of extra boxes to the bottom of the stack, unlike Langstroth hives, causing comb to be regularly harvested and taken out of use. This prevents old comb from being reused and therefore removes any environmental and agricultural chemicals and toxins.
Where to keep your hive
Once you have chosen your preferred type of beehive, you will need to decide where to keep the hive. In order to sustain a healthy and productive hive you will need to select a space where the temperature, prevailing wind and sunlight positively affect your hive. The colony in the hive needs to be able to moderate its own temperature so it is advisable that the hive be sheltered from direct wind or sunlight. The hive should be positioned on level ground but tilted slightly forward so that rain will not run into the hive through its opening.
It is recommended that hives should be placed facing the south/south east, where possible, and close to a bush or tree so that they receive morning sunlight and are protected from strong winds. If you intend to maintain multiple hives, ensure that you allocate sufficient room between each hive in order to walk around them and carry out your daily beekeeping tasks – you will need more space than you first think.
Now that you have chosen your beehive and where to place it, you can begin to construct it. Listed below are the various components of a beehive and how they function:
Hive stand
Your hive will require a solid foundation. Many beekeepers choose to use several breeze blocks with wood on top but you can also purchase a hive stand. This structure serves as the bottom part of your hive and may have an angled landing board for your bees.
- Floor: There are two types of floor which you can use: a solid bottom board and a screened bottom board. The screened bottom board has a screen on the bottom with a removable sticky board which catches Varroa mites and other pests which can harm your colony. A screened bottom board offers all the benefits of a solid bottom board whilst simultaneously aiding in effective hive ventilation.
- Entrance reducer: This appliance is placed between your bottom board and your first brood box to prevent pests and rodents from entering and damaging your hive's structure. These are usually made of wood and many beekeepers only use them in the winter months when the bees are in their cluster and not actively patrolling the entry to their hive.
- Slatted rack: This appliance is an optional addition to your hive which offers the bees more efficient ventilation and temperature moderation. It gives more room between the entrance of the hive and the brood chamber
- Brood box and frames: A brood box is a hive box that houses the frames that support the wax foundation from which the bees draw the cells that make up the honeycomb where the queen will lay her eggs and some stores will be kept. The brood box frames are usually made from wood, although sometimes of plastic, and hold a wired wax foundation, stamped with a hexagonal honeycomb pattern to assist the bees in constructing their honeycomb.
- Supers and super frames: A super is a box that holds the frames where the bees will store their honey. Honey supers are much shallower than brood boxes as honey is heavy and, should you be lucky enough to harvest lots of honey, supers that are not too deep make this an easier task. The stamped wax sheets used in the frames in the supers do not need to be wired and, although the bee space is still maintained, may have thicker bars which means that fewer frames are needed in each super.
- Queen excluder: The queen excluder is a device of either a slotted zinc sheet or wire rods; the width of the slots or between the wires is too small for the queen to pass through but the workers can pass easily. The result is that all the eggs laid by the queen, and hence the brood, are in the box below the excluder. Any boxes with frames placed above the excluder will consist solely of honey and pollen which the beekeeper can remove when required or it can be left as winter supplies for the bees.
- Crown board: The wooden crown board is placed on top of the uppermost super and separates the supers from the roof and stops the bees from sticking the roof down. It will normally have two holes and, with additional one-way bee escapes, can be used to remove the bees from the supers when the time has come to harvest the honey.
- The roof: The hive roof is constructed with the primary aim of keeping the rain off the hive (bees survive cold weather very well, but damp, particularly in winter, often kills a colony). The most common type of roof will fit over the crown board with sides that hang over the hive's upper super.
All of the components of your hive can be purchased from local beekeeping stores or online. Once you have amassed all of the necessary parts then you can begin to construct your beehive from scratch, should you wish. However, most beekeepers limit their DIY work to hammering together the frames and leave the construction to the experts, buying hives that are ready made.
Listed below is a step-by-step guide on how to construct a Langstroth beehive:
- Establish a solid foundation for your hive. In order to prevent your hive from tipping over, it is recommended that you create a solid foundation. Breeze blocks are one of the most commonly used foundations. Simply lay four blocks beside one another on level ground and place another four on top of them for a solid base.
- Lay down the floor of your hive. Place the opening facing towards you.
Place one brood box on the floor of your hive. This will serve as the brood chamber wherein your queen will lay her eggs. - Install ten frames in the brood box. You will be able to remove these frames at a later date depending on the size of your bee colony and your personal hive preferences.
Place a queen excluder on top of the brood box. This will prevent the queen from laying eggs in the honey stores. - Place a super on top of the brood box placed and install ten frames within it. This section will serve as the food storage chamber for your hive.
- Lay the crown board on top of this super and a roof on top of the crown board to complete your beehive. It is also advisable to place a large stone or weight on top of your hive to keep it securely sealed during strong weather conditions.
Over the course of your beekeeping year you might need to add more supers and possibly a further brood box to cope with your growing colony and their honey stores.
Once your beehive has been completed the most exciting moment has arrived and you can add your bees. There are several online stores where you can order bees and have them delivered to your home. Alternatively, you can contact your local Beekeeping Association for information on where to acquire bees in your area. Many people start with a swarm, collected by a member of the beekeeping association which is a very cost-effective method of obtaining bees. However, care needs to be taken as the character of the queen is unknown and you could have a bad-tempered hive with a tendency to swarm. If you are in any doubt, the local association is always ready to help new beekeepers.
6. How to start beekeeping
Beekeeping equipment
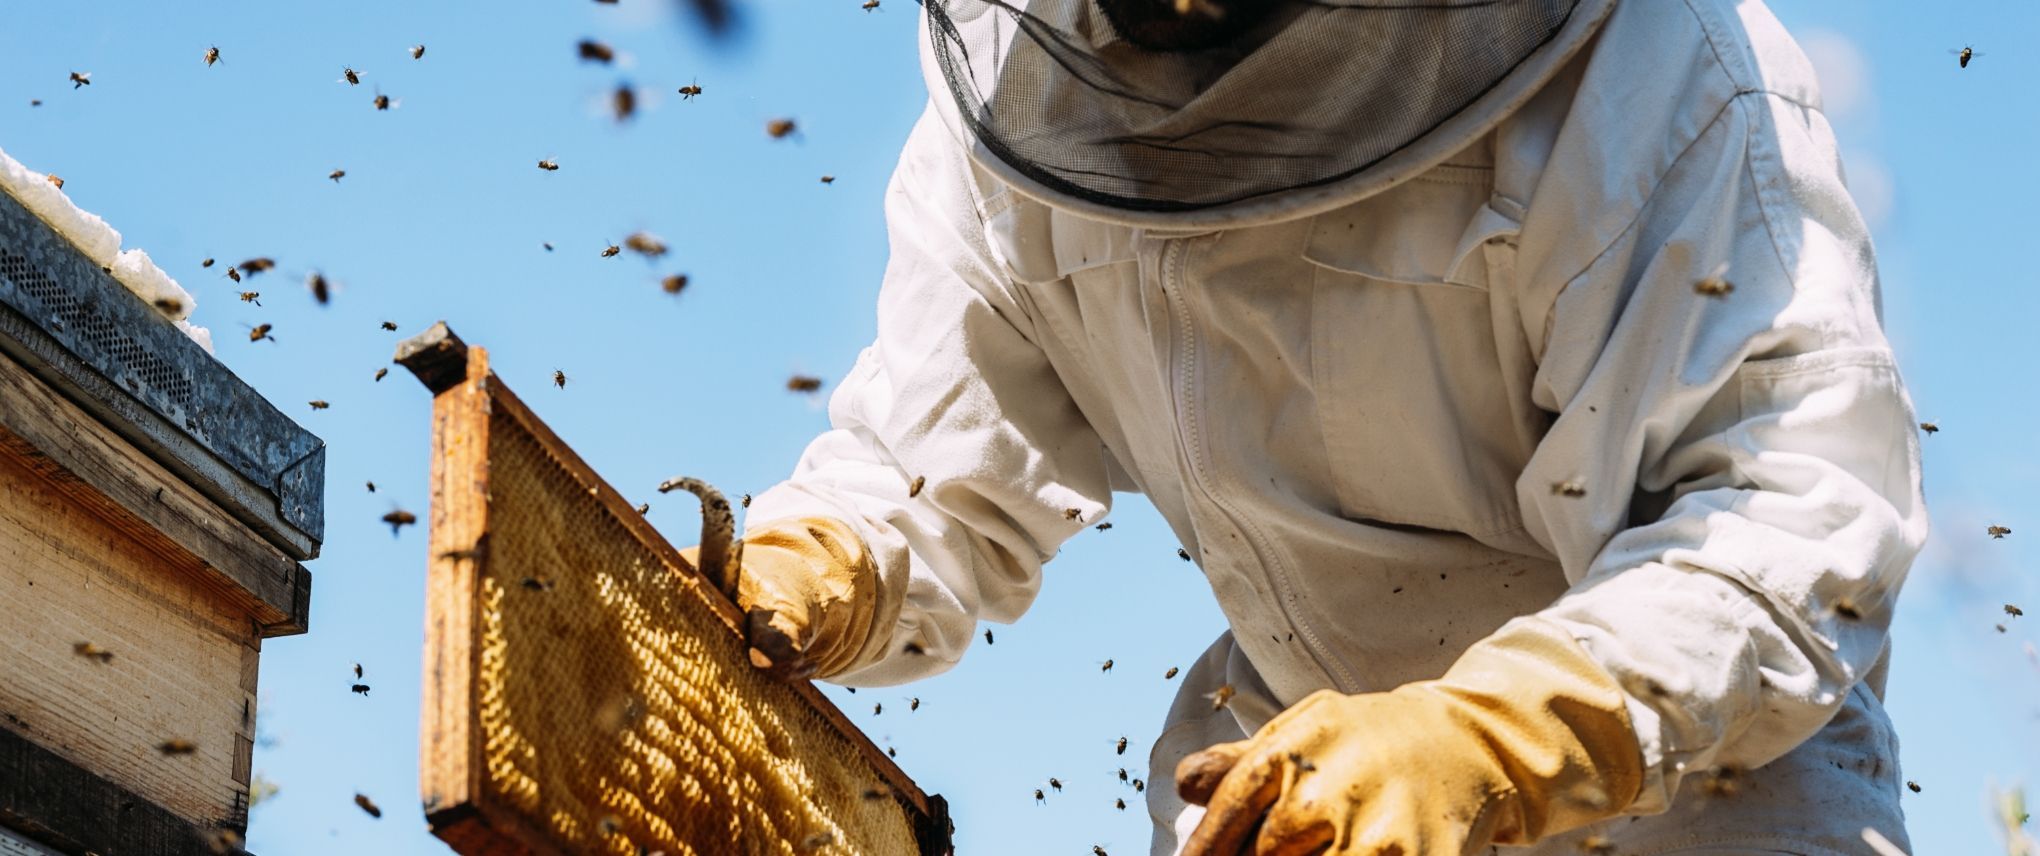
If you wish to maintain the health of your bees and the productivity of your beehive, you will need to carry out various beekeeping tasks. In order to carry out these tasks you will need to acquire the appropriate clothing and equipment in order to protect yourself and your bees. Your protective clothing should consist of:
1. A bee suit.
This suit should include a protective veil which fully covers your head and face whilst you handle your beehive. As well as providing sufficient protection, this suit and veil should also facilitate clear visibility and easy breathing.
2. Beekeeping gloves.
You will need to acquire gloves which offer you protection against bee stings and which can be easily cleaned and thrown away after use. Common examples of beekeeping gloves include disposable latex gloves. This is due to the fact that they do not fester infectious pathogens which could be harmful to you or your colony.
3. Boots.
Strong working boots such as wellington boots or boots with protective toe caps are needed in order to protect you from bee stings or from heavy equipment which may fall upon your feet during beekeeping activities.
4. Cleaning equipment.
A clean hive is a healthy hive. Therefore it is pivotal that you regularly clean and disinfect your beekeeping clothing and equipment. There are specialist beekeeping cleaning supplies which you can purchase online or from your local DIY or gardening store.
5. A bee smoker.
Bee smokers are designed to produce thick cool smoke that you will puff into the hive. When the bees smell the smoke they assume that their hive is in danger, perhaps near a forest fire, and they then start to eat honey to prepare to leave the hive and this eating calms them down. Smoke also masks communication between bees so that they do not raise the 'alarm' as you open the hive. Smokers have bellows attached and a wire heat shield around the body of the smoker to protect you from burns. Lighting the smoker requires some practice as you are aiming to have smouldering material which will produce the perfect smoke. You can use rotten wood, cardboard, damp leaves, Hessian sack or you can purchase smoker cartridges or pellets.
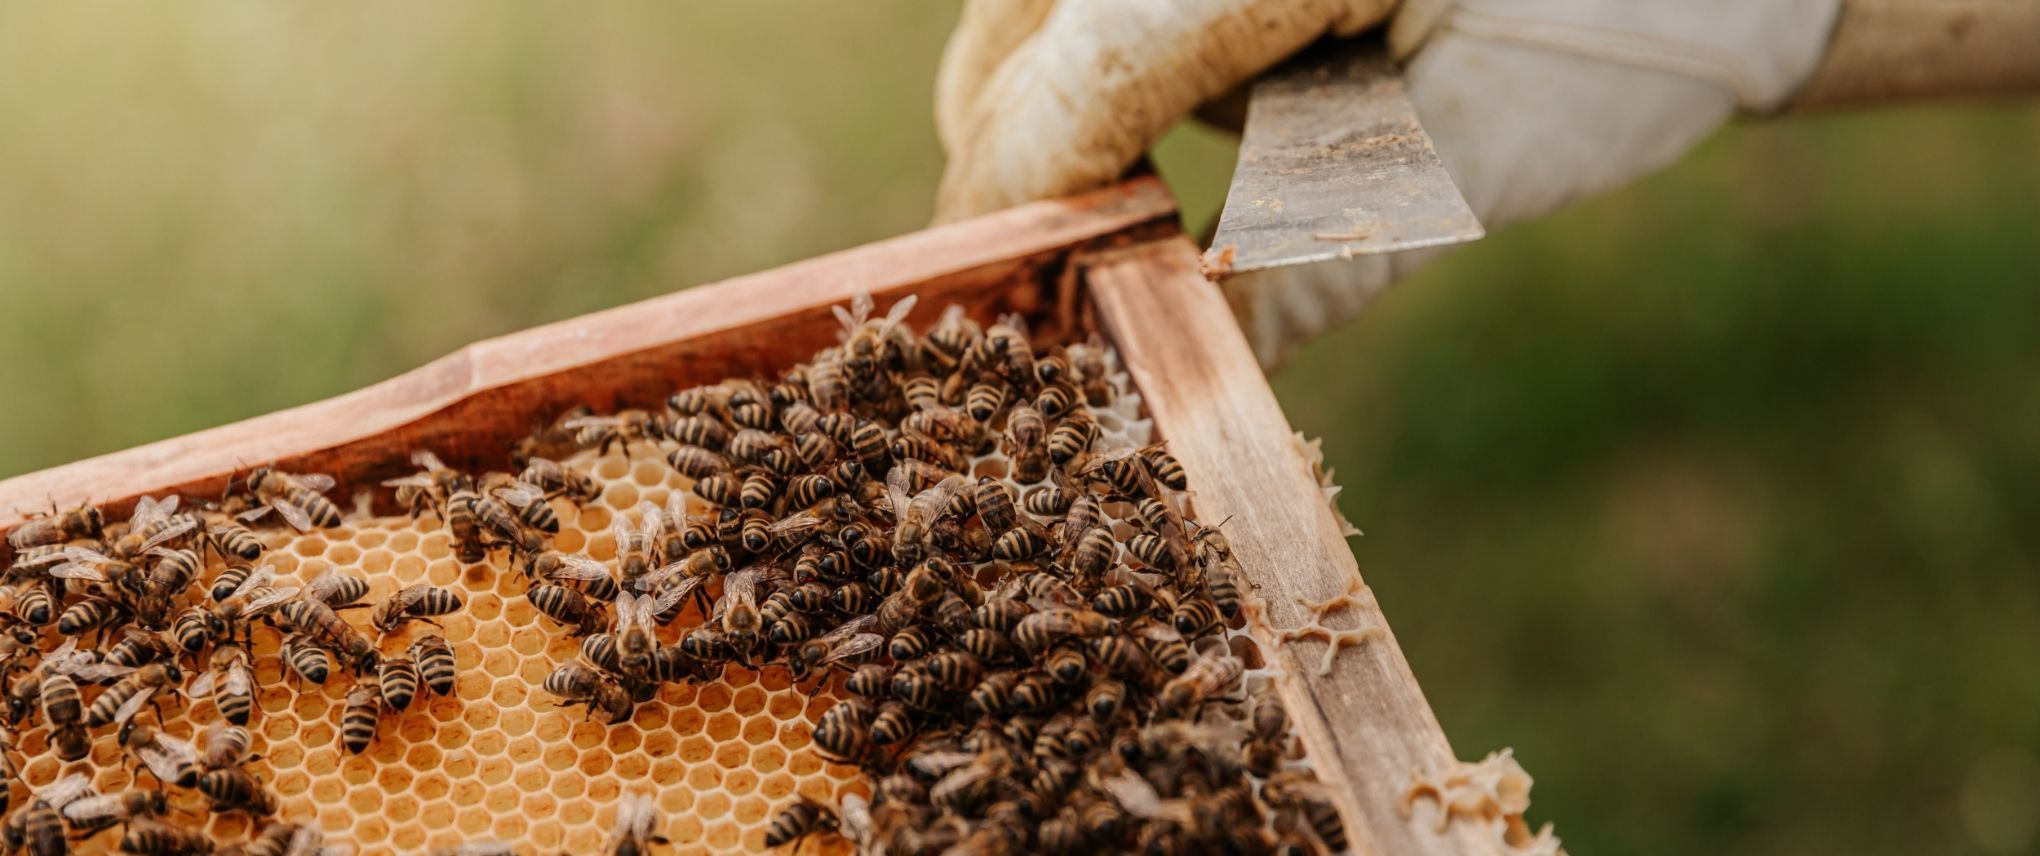
6. A hive tool.
Hive tools are an absolutely indispensable piece of equipment for a beekeeper. There are various types of hive tool and which type you choose is a question of your preference. Bees make a sort of glue called propolis from the resin of trees. They use the propolis to seal up any tiny cracks and crevices in the hive (larger gaps are filled up with comb). The hive tool really is the Swiss Army knife of beekeeping. It is used as a metal lever which helps you prise open parts of your hive or scrape up any mess that the bees have made. It can also be used to scrape any debris, beeswax and plant resin from your frames and to clean inside your hive surfaces. It is a piece of kit that you will find absolutely invaluable – and not just for beekeeping!
7. Honey extraction and filtration equipment.
In order to produce and sell honey from your hive you will need a honey extractor. You will also need the sufficient equipment to filter your honey of any contaminants or waste before packaging and selling it. All of this equipment can be found online via specific beekeeping manufacturing and suppliers sites.
8. Feeding your bees
If your bees do not have sufficient food supplies to survive then you can create your own food supplies to prevent them from starving. You can create a syrup substitute for nectar by mixing white sugar with hot water. Whilst making this nectar substitute, you will need to continue stirring until all of the sugar is dissolved.
The type of food which you give to your bees should alter depending upon the current season. For instance, in the winter months your syrup substitute should have a low water content. This is due to the fact that if the water content is too high then your bees may not have time to dehydrate the food sufficiently in order to prevent fermentation before the cold weather begins. Consequently, if your bees require additional food stores during the winter months then you should feed them baker's fondant which they can eat immediately and which will not ferment.
During the spring and summer months you can provide your bees with food which has a higher water content. An acceptable spring and summer syrup substitute should mix one kilo of sugar with one litre of water, whereas in the autumn months you should mix one kilo of sugar with only half a litre of water.
As well as moderating the water content of your syrup substitute, you should also carefully select the type of sugar you use. You should only ever use refined white sugar because unrefined or brown sugar can cause dysentery in bees. Moreover, if you use pure sugar syrup then it will have no odour. As a result, you bees may not even notice your syrup substitute in the hive. To rectify this issue, add a little honey to your mix and apply it into their brood chamber so that they have a food trail to follow.
You can supply your food substitute to your bees via containers known as 'feeders' which can be placed above your brood chamber. These feeders facilitate restricted access to prevent your bees from falling into the feeder and drowning. To prevent your bees from drowning, you should never place an open container of syrup into your hive. Furthermore, you should place your feeders onto your hive in the evening. This will prevent the overexcitement of your bees as well as reducing the chances of external pests depleting your hive's food stores.
Beekeeping tasks
Throughout the year there are several beekeeping tasks which you can carry out to facilitate the growth of your hive and the health of your bee colony. These tasks can be categorised by season as follows:
Spring:
The springtime is the best season to start a new hive and feed your pre-existing bees if necessary. During the winter they will have relied upon their summer food stores which may be depleted by spring. Alternatively, if your hive has any excess honeycomb stores left over the winter, now is the time to harvest it. If you require to add any new chambers to your hive or carry out any repairs then springtime is also the ideal season during which to carry out these tasks.
Summer:
During the summer your bees will be working at their fastest rate – building honeycomb, bringing nectar and pollen back to the hive and caring for their brood. As a result, there are not many tasks which you will need to carry out during the summer months. However, it is worthwhile checking on your bees regularly in order to prevent any future problems from occurring. For instance, if you are using a top-bar hive or if your hive does not have a foundation then you should check that all of your combs are hanging straight. Summer is also the time to harvest any excess honey stores which your bees are producing.
Autumn:
During the autumn months you will need to begin preparing your hive for the cold winter months. This will require providing your bees with sufficient food stores to survive through the winter and into the spring, as well as reducing the hive entrance, facilitating effective ventilation channels and applying guards against pests and rodents. Moreover, the autumn is the prime time for collecting the honey which your bees have produced during the summer. However, it is important to leave enough honey stores to enable your bees to survive and feed themselves throughout the winter.
Winter:
The winter is the season during which your bees are highly susceptible to the cold and severe weather conditions. On a regular basis your bees will need to maintain temperatures between 22 and 25 degrees Celsius for the general colony, 34 to 35 degrees Celsius for the brood chamber, and up to 40 degrees Celsius for honey maturation. As a result, it is vital that you cover your hive with a protective jacket. You can purchase custom jackets online or construct your own using a thick plastic bag which has been lined with a strip of R19 insulation. You should fasten this jacket to the bottom of your hive with tape or staples to ensure it does not fall off during high winds, rain or snow.
You should also order your new bees in the winter months for their arrival in the following April. It is possible to order bees from specific online stores or to check with your local Beekeeping Association for suppliers near you or for any local swarms. If you are purchasing bees from a local or online supplier, then it is advisable to order a 5 or 6 frame nucleus of bees. Nucleus, or 'nucs' as they are commonly known, will consist of a frame of honey bees along with a brood, a queen bee and food stores.
It is advisable to purchase bees which have been bred locally within the UK in order to avoid a foreign hybrid species. As well as checking online or with your local Beekeeping Association, you can locate a reputable Bee Breeder via beekeeping magazines and journals through which to purchase complete colonies or nucleus.
7. Collecting honey from your beehive
The average hive produces 25lbs of honey, which in a good season can increase up to 60lbs of honey. It is important that you extract these honey supplies efficiently in order to reap the maximum benefits from storing and selling your honey. To help you extract your honey successfully, listed below is a step-by-step guide to extracting honey from your beehive:
1. REMOVE EACH FRAME OF CAPPED HONEY FROM YOUR HONEY SUPER
Each cell of honey will be 'capped' or sealed by a mould of wax. Ensure that you extract each frame individually in order to prevent any damage to your hive's structure.
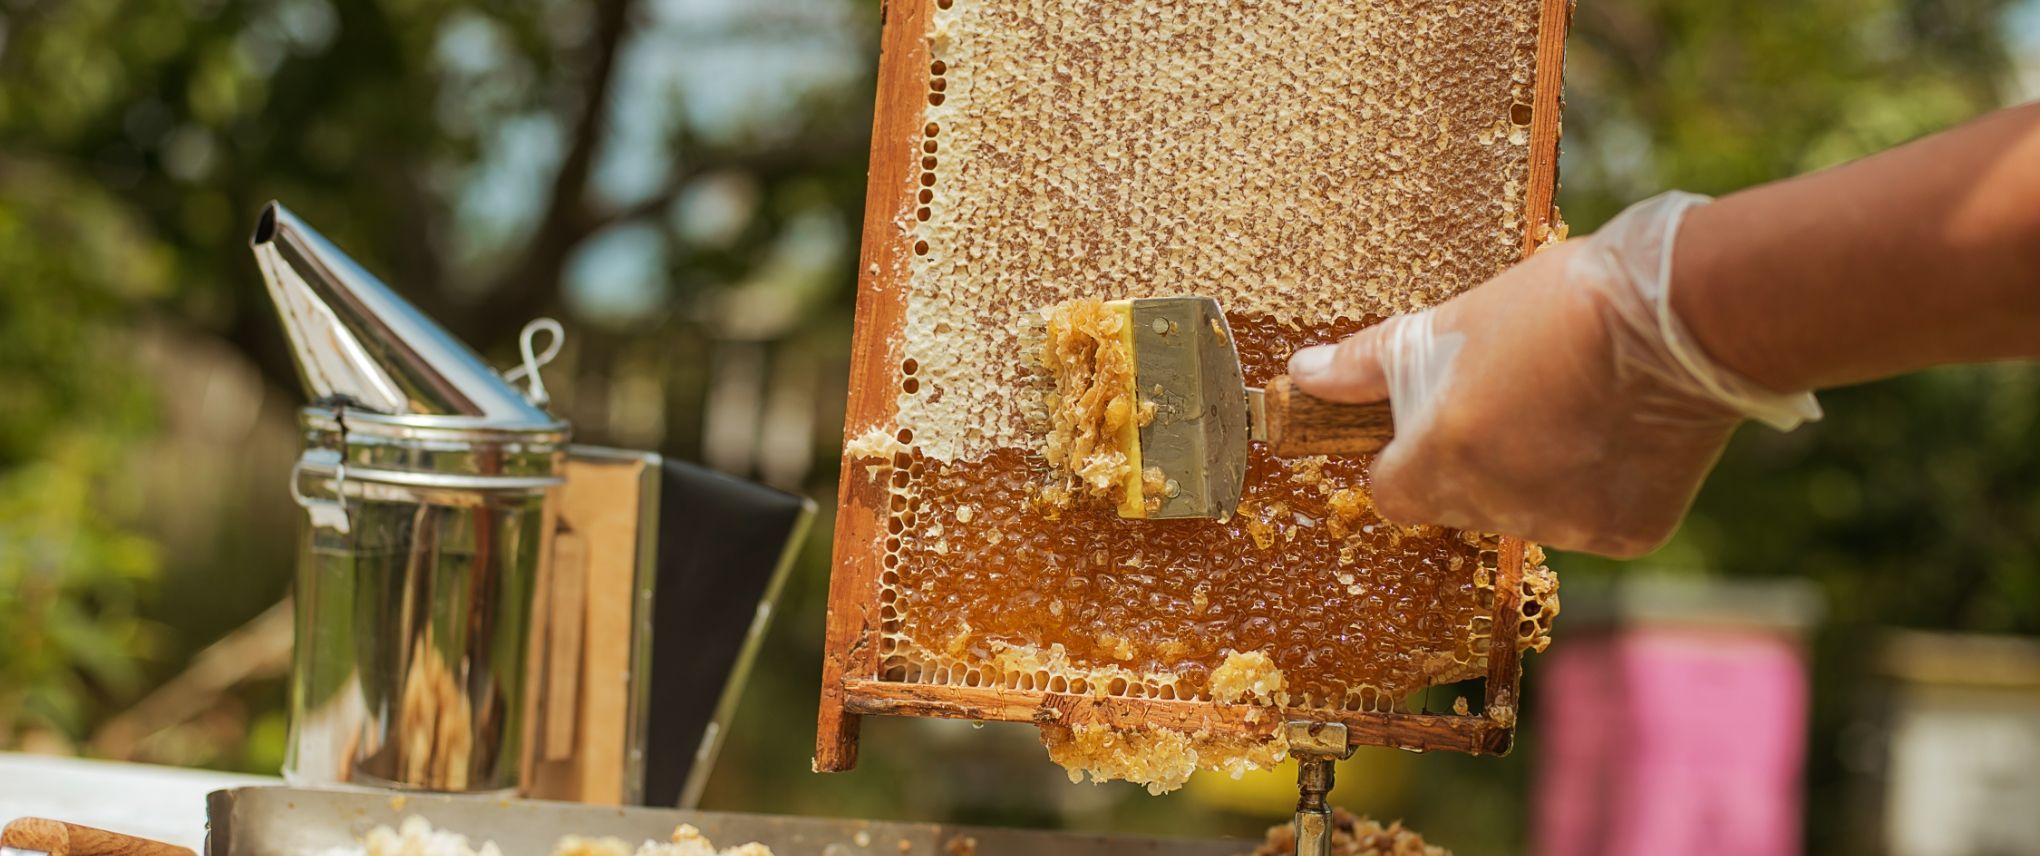
2. USE AN UNCAPPING TANK TO REMOVE YOUR HIVE'S WAX CAPPING
You can purchase an uncapping tank from a local beekeeping supplier or online site. These appliances facilitate the uncapping of honey cells for the extraction of honey. Hold each frame vertically over your uncapping tank and tip it forward gently in order to help the capping fall away from the comb as you slice them.
3. REMOVE THE WAX CAPPINGS AND EXPOSE THE HONEY CELLS
You can do so by using an electric uncapping knife or a serrated kitchen knife. When slicing your wax cappings you should commence a quarter of the way from the bottom of the comb and slice upward to expose the honey cells. After doing so slice the knife downwards to expose the honey cells on the lower section of the frame. If any honey cells remain you can use an uncapping fork, or 'cappings scratcher' as it is commonly known, to expose any outstanding cells. The cranked needles on an uncapping fork enable you to extract honey with minimal wastage.
4. PERFORM THE SAME TECHNIQUE ON THE OPPOSITE SIDE OF YOUR FRAME:
Flip your frame over and extensively remove any wax cappings in order to expose the honey cells and harvest as much honey as possible. After uncapping each frame, place it vertically into your extractor device. An extractor device can be purchased online or from a local beekeeping supplier and is used to spin the honey from the uncapped cells. The spun honey is dispensed into a holding tank.
5. USE YOUR EXTRACTOR TO REMOVE THE HONEY FROM YOUR COMBS:
Once you have uncapped enough frames and your extractor is full, you can place the extractor lid on, seal it and begin to turn the crank. You should begin spinning your extractor slowly and then accelerate gradually in order to extract your honey gently from the wax combs. After approximately five minutes of spinning, you should turn all of your frames over in order to expose the opposite sides to the spinning process. After another five minutes your combs will be empty and you can return your frames to your Honey Super.
6. FILTER YOUR HONEY THROUGH TO A BOTTLING CONTAINER:
You should open the valve at the bottom of your extractor which will allow your honey to filter through a honey strainer and into your bottling container. If you purchase a specific bottling container or 'bottling bucket' then you can use its integrated valve to fill your honey jars.
7. PURCHASE HONEY JARS AND FILL THEM:
It is important to purchase appropriately sized jars within which to store your honey. Each shallow Honey Super yields a honey harvest of approximately 30 pounds so it is important to purchase jars according to your hive size. Fortunately, standard honey jars are available in one, two and five pound sizes to accommodate your individual preferences.
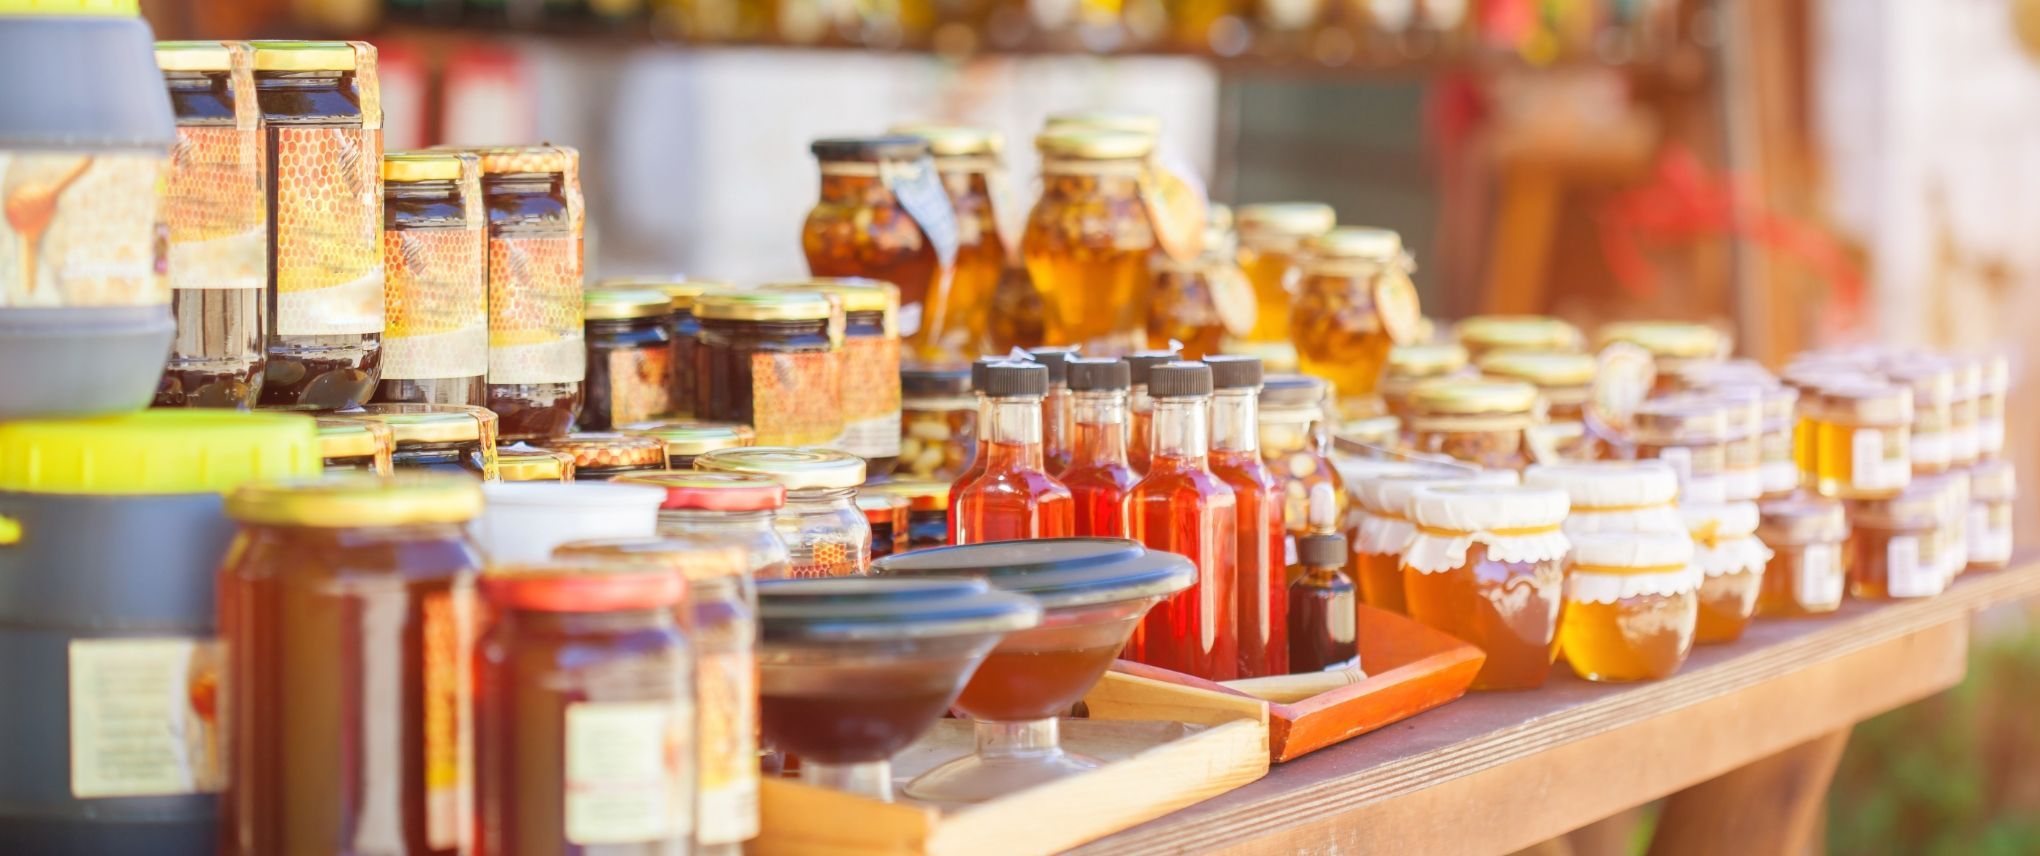
8. Storing and selling honey
As your hive begins to grow and expand you may find yourself with a surplus supply of honey. Many beekeepers choose to sell this surplus honey and make a modest additional income to bolster their regular wage. Given that you do not need a license to package and sell honey, it is an extremely promising venture for both small scale and large scale beekeepers.
If you intend to bottle, package and sell your honey for commercial use then there are several factors which you will need to consider. For instance, you will need to include certain information on the labels for your jars which certifies that your honey is legitimate and safe to consume. The information which you will need to state on your honey jar labels includes:
Under EU law, certain information must be included on every jar of honey that you sell.
1. BEST BEFORE DATE:
All food products must contain a 'best before date' which indicates when they will expire. Honey lasts approximately two years from the point of bottling so you will need to mark the date, month and year when it is expected to expire.
2. THE COUNTRY OF ORIGIN:
If you have produced your honey within the UK then your honey labels should bear the words 'Product of the UK' and include the producer's address. You should check the regulations of your local area to ensure your honey fulfils the necessary regional requirements. Otherwise, your honey must bear the words 'Product of more than one Country'.
3. THE LOT NUMBER:
Your lot number identifies that you have produced each jar of honey and that each jar can be traced back to your colony and the date of processing. You should also include the producer's name and address on your honey jar labels.
4. THE WEIGHT OF HONEY IN THE JAR:
Your label must display the weight of honey in the jar. The weight contained in the jar must be equal or greater than the weight displayed on the label.
5. HOW YOU BRAND YOUR HONEY:
There are specific reserved descriptions for different types of honey. For instance; blossom or nectar honey (which has been obtained from the nectar of plants), honeydew honey (which has been obtained from the excretions of insects or plants), comb honey (which has been stored in the cells of freshly built brood-less combs), chunk or cut comb in honey (which contains pieces of comb honey), drained honey (which has been sourced by draining de-capped brood-less combs), extracted honey (which has been sourced by centrifuging de-capped brood-less combs), pressed honey (which has been sourced by pressing brood-less combs with or without the addition of heat), filtered honey (which has been sourced by removing foreign inorganic or organic matters in order to extract pollen) and baker's honey (which is suitable for use as an ingredient or in other processed foodstuffs, which has foreign tastes or odours, which has been overheated or which has begun to ferment). It is important to correctly categorise your honey if you intend to sell it commercially. If you are unsure of your honey's type, then you can contact your local Beekeeping Association or Food Hygiene Administration for more information.
6. CREATE AN ATTRACTIVE LABEL FOR YOUR HONEY:
As well as the national Food Hygiene regulations which you will need to consider, your honey jar labels should also promote your honey to potential customers. As a result, you should consider how you wish to brand your honey. If you can invent a unique and eye-catching logo or slogan which will pique customer interest, then you can begin to successfully sell your honey. If you intend to sell your honey on a larger scale, then it is worthwhile investigating patents and trademarks in order to register your particular brand of honey and its logo. Alternatively, you can acquire standard packaging labels from your local beekeeping supplier.
Once you have bottled and labelled your jars of honey then you can begin to sell them. If you intend to turn your beekeeping hobby into a commercial business venture, then there are several avenues which you should investigate in order to solidify a strong customer base.
One of the most lucrative resources from which you can benefit is your local community. Health food stores and local farmers markets are always looking for a source of fresh, local honey. If you visit these stores and markets as well as other local gift stores, gardening centres and fairs then you can find a sustainable outlet through which to sell your honey. You can even contact your local Beekeeping Association for advice. By conversing with local beekeepers you can gain exclusive insights on how to successfully bottle, package and sell honey in your local area.
As well as selling your honey locally you can also capitalise upon the enormous resource that is the Internet. By creating a simple website you can sell your honey internationally to a substantially larger audience. You can even create business cards which include your website address on them. By handing out these cards in your local area you can encourage people to purchase your honey and recommend it to others. Alternatively, if you do not have a personal website then you can create an account on auction sites such as eBay through which you can sell your honey. However, if you intend to sell your honey via the Internet, then you will need to carefully package your honey so that it does not break during transit.
9. How to protect your beehive from pests and diseases
There are several pests and diseases which have been known to harm bee colonies in the UK in recent years. This section of the guide will introduce you to some of the most common honey bee pests and diseases which could adversely affect your hive, as well as illustrating effective treatment methods in order to protect your colony.
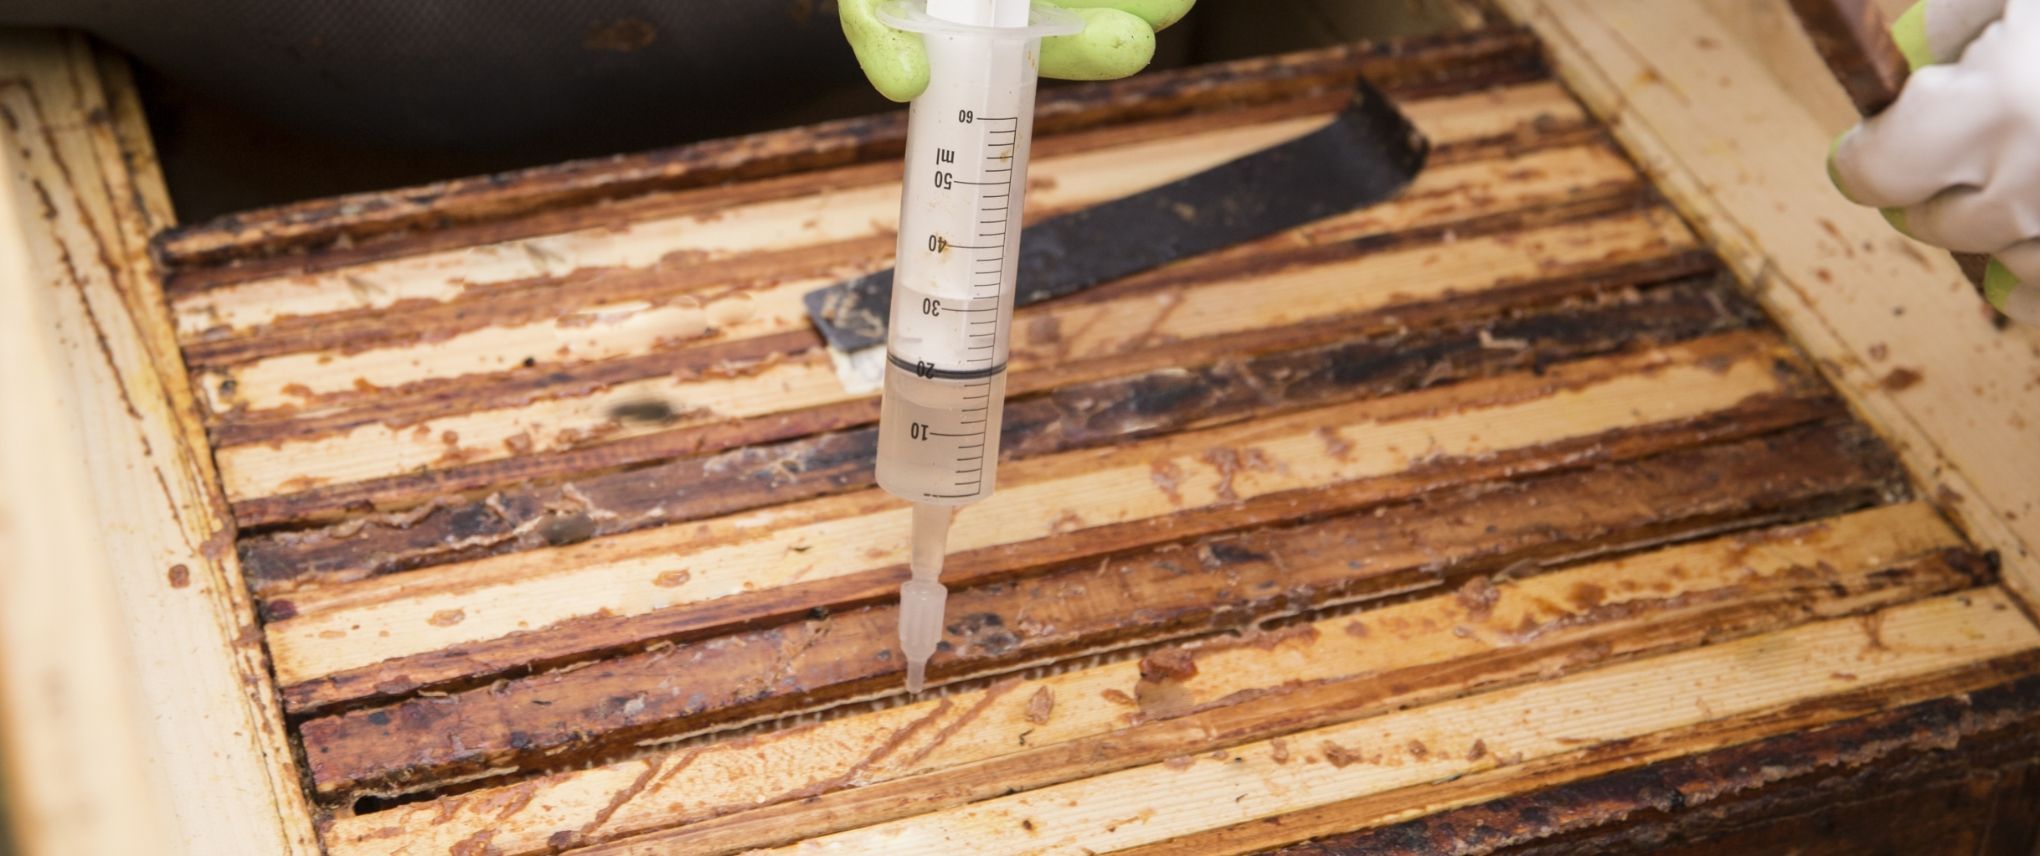
Varroa destructor or varroa mites:
These are the most common pests in the UK that are known to infect honey bee colonies. These external parasitic mites attach themselves to the body of honey bees. Once attached, the varroa mite sucks hemolymph out of the honey bee. Hemolymph is the blood of honey bees and consequently varroa mites will weaken your bees and spread viral 'varroosis' diseases throughout your hive; which in turn can result in the death of your bee colony.
Varroa mites reproduce on a 10 day cycle wherein they enter the brood cell of a hive and lay eggs on the honey bee larvae. Once the honey bees develop, the mites attach themselves to the bees. As these bees spread throughout the hive the mites can then begin to feed off of other bees and larvae.
Subsequently, it is important to regularly check your hive for varroa mites. It is worthwhile scrutinising your hive's drone bees as varroa mites are known to primarily target drone bee cells. Once you have identified a varroa mite infestation there are several treatment methods which you can utilise. There are several 'miticide' chemicals on the market which you can buy from your local beekeeping supplier in order to treat your colony. Always read the instructions on the miticide label carefully. Moreover, varroa mites can develop a resistance to miticides so it is advisable to alternate the products which you use each season. Common synthetic miticides include:
Apistan
These strips contain pyrethroid insecticide which you can hang in the brood chamber of your hive. Your bees will brush against these strips and spread the miticide throughout the hive; thus effectively killing any varroa mites.
Check-mite
These strips contain organophosphate insecticide and they offer an alternative to Apistan. Check-mite is useful if your particular varroa mite infestation has developed an immunity to Apistan.
As well as synthetic miticides, there are several naturally occurring chemicals which you can use to treat a varroa mite infestation. Some of the most effective naturally occurring chemicals include:
Mite-away
These pads or vapour spray products contain formic acid which eradicate any varroa mites in your hive.
Powders
You can use powdered sugar, talcum powder or other powders with a grain size of between 5 and 15 µm. Sprinkle these powders on your bees to prevent varroa mites from feeding on your bee's hemolyph.
Hopguard
These strips are made from natural hop compounds and serve as a natural alternative to Apistan.
Oils
Essential oils such as lemon, mint and thyme oil, as well as mineral oils, can be inserted into your hive to protect your bees from varroa mites.
As well as natural and synthetic chemicals you can also use a drone comb to capture and remove varroa mites from your bee hive. You can purchase a drone comb online or from your local beekeeping supplier. This special drone comb foundation frame has large hexagons imprinted in the sheet. As a result, your bees will only construct drone comb on these specific sheets. Given that varroa mites prefer to attach themselves to drone bees, they will be attracted to these sheets. Once the drone cells are capped you can remove the foundation frame and place it in the freezer overnight to kill off the varroa mites from the cells. You can then return this sheet to your hive and repeat the process until all varroa mites are eradicated.
Small Hive Beetles
Small Hive Beetles or Aethina tumida are extremely destructive pests for honey bee colonies. They are reddish or dark brown in colour and can cause damage to the comb, stored honey and pollen within the hive. This is due to the fact that small hive beetle larvae will travel throughout honey combs; feeding, defecating and causing the honey to ferment and discolour as they travel throughout the combs. Moreover, if your hive has been contaminated by a heavy small hive beetle infestation it may cause your bees to abandon their hive.
If you regularly check your hive for small hive beetles and larvae you can actively prevent a large scale infestation from occurring. Once you have detected small hive beetles within your hive, there are several measures which you can put into place. As well as using the miticides mentioned above for treating varroa mites, there are a variety of traps which you can purchase online or from your local beekeeping supplier in order to remove small hive beetles from your hive. Amongst some of the most popular beetle traps include:
Wasp Traps:
These traps can be placed on the bottom board of your hive. They contain a shallow pool of oil which is covered by a slatted screen to exclude your honey bees from becoming trapped. Adult small hive beetles enter the trap from above, fall into the oil and drown. However, in order for these traps to be effective they must be kept level at all times.
Hood Traps:
These traps attach to a standard bee hive frame and contain a compartment which is filled with apple cider vinegar. This vinegar attracts the beetles who fall into compartments which are filled with mineral oil and they then drown.
Freeman Beetle Traps:
Similar to the bottom boards in West Traps, Freeman Beetle Traps contain a 3 mm screen mesh and an oil-filled tray which is inserted into a compartment below the screen mesh. The adult beetles enter the trap to escape from the bees, fall into the oil and subsequently drown. Beetle larvae can also fall into the trap as well as other pests such as varroa mites. However, much like Western Traps, Freeman Beetle Traps must be kept level in order to function effectively.
Beetle Jail Traps:
These traps are designed to prevent hive beetles from invading a bee hive in the first place. They trap the beetles as they seek to enter the hive and drown them in oil.
European Foulbrood
European Foulbrood or Melissococcus plutonius is a bacterium which affects the gut of honey bees who have eaten contaminated food. Symptoms include dead or dying larvae which appear curled upwards and which have turned a brown or yellowish colour. Your bees may also appear melted or deflated with dried out, rubbery or apparent tracheal tubes. European Foulbrood is considered as a stress disease which affects unhealthy bee colonies. Therefore if you ensure your bee colony is strong and healthy then they are far less susceptible to contract European Foulbrood.
If you suspect your bees are suffering from European Foulbrood then you should contact your local Beekeeping Association immediately for treatment advice. Your colony can be treated by antibiotic medications such as oxytetracycline or via a Shook Swarm husbandry method. To perform this method you will need:
- A fresh brood chamber
- A floor with an entrance block
- A full set of frames and foundation
- A spare queen excluder
- An inner cover
- A hive top feeder
- A sugar syrup feed
- A container for the combs
Before carrying out this method you will need to ensure that all of your equipment is sterilised and that you are wearing protective clothing. Listed below is a step-by-step guide on how to carry out the Shook Swarm husbandry method:
- Shift your hive so that it can be shaken to one side
- Place the clean floor with an entrance block on the original stand
- Place your spare queen excluder on the floor
- Place your fresh brood chamber with frames and foundation on top of the queen excluder
- Remove a few of the frames from the centre of the brood chamber to create a small, dark space into which you can insert your bees
- Dismantle your original hive and place your queen bee in between the frames and foundation
- Remove each brood frame and shake the frame diagonally across your new brood chamber
- Place the old, empty frames into the container. If these frames are infected with European
- Foulbrood then they must be burned to remove all traces of the disease
- Repeat this process with all of your remaining frames
- Insert the spare frames into the central space of the new brood chamber
- Insert your queen into the new brood chamber
Colony Collapse Disorder
Colony Collapse Disorder is a phenomenon in which worker bees from a European honey bee colony disappear for no apparent reason. Although the causes for colony collapse disorder remain unclear, many researchers have cited possible causes which include: varroa mites, the use of pesticides, harmful pathogens, genetic factors, loss of habitat, malnutrition and changing beekeeping practices. Initial symptoms of colony collapse disorder include:
- An insufficient workforce who are unable to maintain the current brood
- A workforce consisting primarily of young adult bees
- The colony is reluctant to consume the provided food stores
Once colony collapse disorder has taken place you may notice the following signs:
- Brood which have been capped over in their cells
- Substantial food stores of honey and pollen which are not immediately robbed by other bees or pests
- The presence of the queen: If the queen has disappeared the hive is considered to have died because it is queenless. However, if the queen is present when the hive dies then it is considered colony collapse disorder.
Although the primary cause of colony collapse disorder is as yet unknown, there are several measures you can put into place to prevent it adversely affecting your hive. As well as these measures, you can contact your local Beekeeping Association for more information and advice:
- Feed your colony Fumagillin in the spring and autumn to prevent Nosema – a fungus which adversely affects honey bees. It has been suggested that Nosema can create stress symptoms amongst bees which can lead to colony collapse disorder.
- Replace your hive's old combs with new foundation every year in order to reduce the amount of residual chemicals in the older beeswax.
- Provide adequate ventilation for your hive.
- Perform regular checks on your hive for pest infestations or diseases.
- Feed your bees when their natural food stores of nectar and pollen are depleted.
- If your hive displays symptoms of colony collapse disorder, replace all of your equipment and do not use it again on that particular hive.
- Do not use synthetic chemicals or pesticides in your garden which may be harmful for your colony.
10. Local rules and regulations
If you wish to keep bees in the UK then you need to abide by the local and national rules and regulations for beekeeping. The principle UK legislation regarding beekeeping is the 1980 Bees Act. This legislation was introduced to control, inspect and treat the various pests and diseases which affect honeybee colonies throughout the UK. The 1980 Bees Act enables the Ministers or the Secretary of State to create Orders which will control pests and diseases. The Act also enables these Ministers or the Secretary of State to grant authorised persons the power to remove and/or destroy bee colonies which are infested with harmful pests or diseases. Under the act, the FERA (Food and Environment Research Agency) National Bee Unit is deemed responsible for apiary surveillance as well as pests and disease control across England and Wales.
A series of statutory orders have been established since the introduction of the 1980 Bees Act. The most notable of these orders is the Bee Diseases and Pests Control Order of 2006. The Order was introduced in order to replace the Bee Diseases Control Order of 1982 and revoke the Importation of Bees Order of 1997. The Order lists in detail the various pests and diseases for which statutory action must be taken to control them. Amongst these pests and diseases are included American foulbrood (AFB), European foulbrood (EFB), and the Small Hive Beetle (Aethina tumida) and Tropilaelaps mites – the latter two not yet being a threat to British bees. Within the Order are both revised and new measures on how to treat these diseases should an infestation occur. As well as national and local rules and regulations, there are also a series of beekeeping associations, local groups and training courses which you can use to broaden your beekeeping experience and expertise. Organisations such as BeeBase, the Bee Farmers Association, the National Farmers Union and the British Beekeepers Association offer advice and ongoing support to both small- and large-scale beekeepers. For instance, the British Beekeeper's Association is a registered charity which was founded in 1874.
To this day, this association represents the interests of 25,000 amateur beekeepers and the 3 billion honey bees for which they care. Furthermore, if you have a particular issue which you need resolved, then you can contact the Bee Diseases Insurance Ltd (BDI). As well as funding research into various bee diseases and offering training courses on how to treat diseases, the BDI provides insurance for the replacement of beekeeping equipment if it has been destroyed as a direct result of a virulent beekeeping disease such as European Foulbrood or American Foulbrood.
If you wish to consolidate your knowledge of beekeeping, there are several training courses on offer. You can study for and receive a National Diploma in Beekeeping (NDB) as well as attend various other short term and advanced courses. Moreover, if you wish to remain informed of the latest beekeeping news and phenomena, you can subscribe to various beekeeping magazines and online journals. Some of the most popular beekeeping resources include:
BeeCraft Bees for Development, Bees Abroad
International Bee Research Association (IBRA)

"I first started beekeeping over 20 years ago when I moved to a house in the country with a large garden surrounded by rolling fields and dense woodland. It was a beautiful summer and the sight of the bees buzzing contentedly whilst going about their work inspired me to think about owning some hives so I could better understand and appreciate the life of bees. It seemed to be the perfect hobby in the circumstances but I certainly wasn’t brave enough to take the plunge and try to look after a colony of bees without instruction!
I was fortunate enough to know a local beekeeper who gave a short course on the theory and practicalities of keeping bees at my local college and then, having completed my 6 weeks of theory, she encouraged us all to become members of our local beekeeping associations. There, experienced beekeepers give up their time to run practical courses for beginners who can learn whether the sight of so many bees is something with which they can be comfortable and help them build up their confidence to embark on a beekeeping career.
Having learned all I could, I took the plunge and ordered my first hive and then, having put my name down on the association’s ‘swarm list’, I waited with great excitement for my swarm to arrive. I was called by a ‘swarm collector’ from the association and met her where the swarm had been reported and helped her collect ‘my’ bees from the tall tree where they were hanging from a branch. Driving home and rehousing the bees in my new hive was so exciting and studying them as they settled in and expanded their colony fascinated me and has continued to do so.
I began beekeeping in the early 1990s which was just before the first varroa mites were discovered, by an amateur beekeeper, in the UK. Beekeeping was more straightforward then than it is now and, sadly, it is almost certain that there are no longer any feral colonies of honey bees in the UK. This means that it is not usually possible to acquire bees free of charge these days – although some bees do swarm from other apiaries. But any cost associated with starting to keep bees is money very well spent for the hours of pleasure that this fantastic hobby will give you!"
ArenaFlowers in house Apiarist Jackie.
12. Useful links
If you have any further questions regarding beekeeping and how to maintain the health of your honey bee colony, there are a variety of websites which you can visit. These online resources can provide you with relevant advice and support according to your individual beekeeping practices. Irrespective of the scale of your hive or the type of equipment which you use, these informative websites can offer advice on how to improve the productivity of your hive and the particular resources from which you can benefit:
The National Bee Unit Website
The British Beekeepe's Association
UK Governmental policies on beekeeping and bee health
Beekeeping discussion forum
Protective clothing and accessories
How bees make honey
Beekeeping supplies
Books on beekeeping
Beekeeping journals and magazines
How to purchase beehives and other equipment online
How to assemble a beehive box or super